How We Encapsulate Crawl Spaces in Central Illinois
When a homeowner finally makes the call, something shifts.
We come out and do a thorough inspection. We get under the home and look at everything — and we show you what we're seeing in real time so there are no surprises when we sit back down with you. You'll know exactly what's down there. You'll know exactly what it takes to fix it. And you'll have a clear picture of what your home looks like after the work is done.
No pressure. No scare tactics. Just an honest look at what's happening and a straightforward plan to address it.
Most homeowners tell us the same thing after that first visit.
They wish they hadn't waited as long as they did.
Two Layers. One Right Way to Do It.
What you're watching in this video is a crawl space encapsulation from start to finish. No narration, no explanation—just the work happening in real time.
First comes the dimple mat across the entire floor. Then the poly vapor barrier goes over the top. Two layers, installed in a specific order, for a specific reason.
Most people assume crawl space encapsulation is just rolling out some plastic sheeting and calling it done. And honestly, a lot of contractors treat it that way. But there's a right way to do this, and there's a fast way. They're not the same thing.
Here's what's actually going on in that video, and why every step matters for your home.
The First Layer: Why Dimple Mat Matters
The dimple mat is the layer most contractors skip.
It doesn't look like much—a textured plastic sheet that goes down before anything else. But that texture is the whole point. Those raised dimples create a gap between the ground and your vapor barrier. A drainage space where moisture can move instead of building up pressure against your barrier from below.
Here's the problem with skipping it: ground moisture doesn't just sit there. It pushes up. And if your vapor barrier is lying flat against the ground with nowhere for that moisture to go, it's fighting a losing battle from day one. The barrier gets compromised. Moisture finds its way through. And eventually you're back to the same problems you paid to fix.
The dimple mat is the foundation of the whole system. Everything else builds on top of it. Skip that step and you haven't really solved the moisture problem—you've just covered it up for a while.
The Second Layer: The Vapor Barrier
Once the dimple mat is down, the poly vapor barrier goes over the top. This is the layer most people picture when they think crawl space encapsulation. But how it gets installed matters just as much as whether it gets installed.
Thickness matters. A cheap, thin barrier tears easily and breaks down faster. We use heavy duty poly that's built to last.
Overlap matters. Seams need to be properly overlapped and sealed, not just laid edge to edge. Any gap is an entry point for moisture.
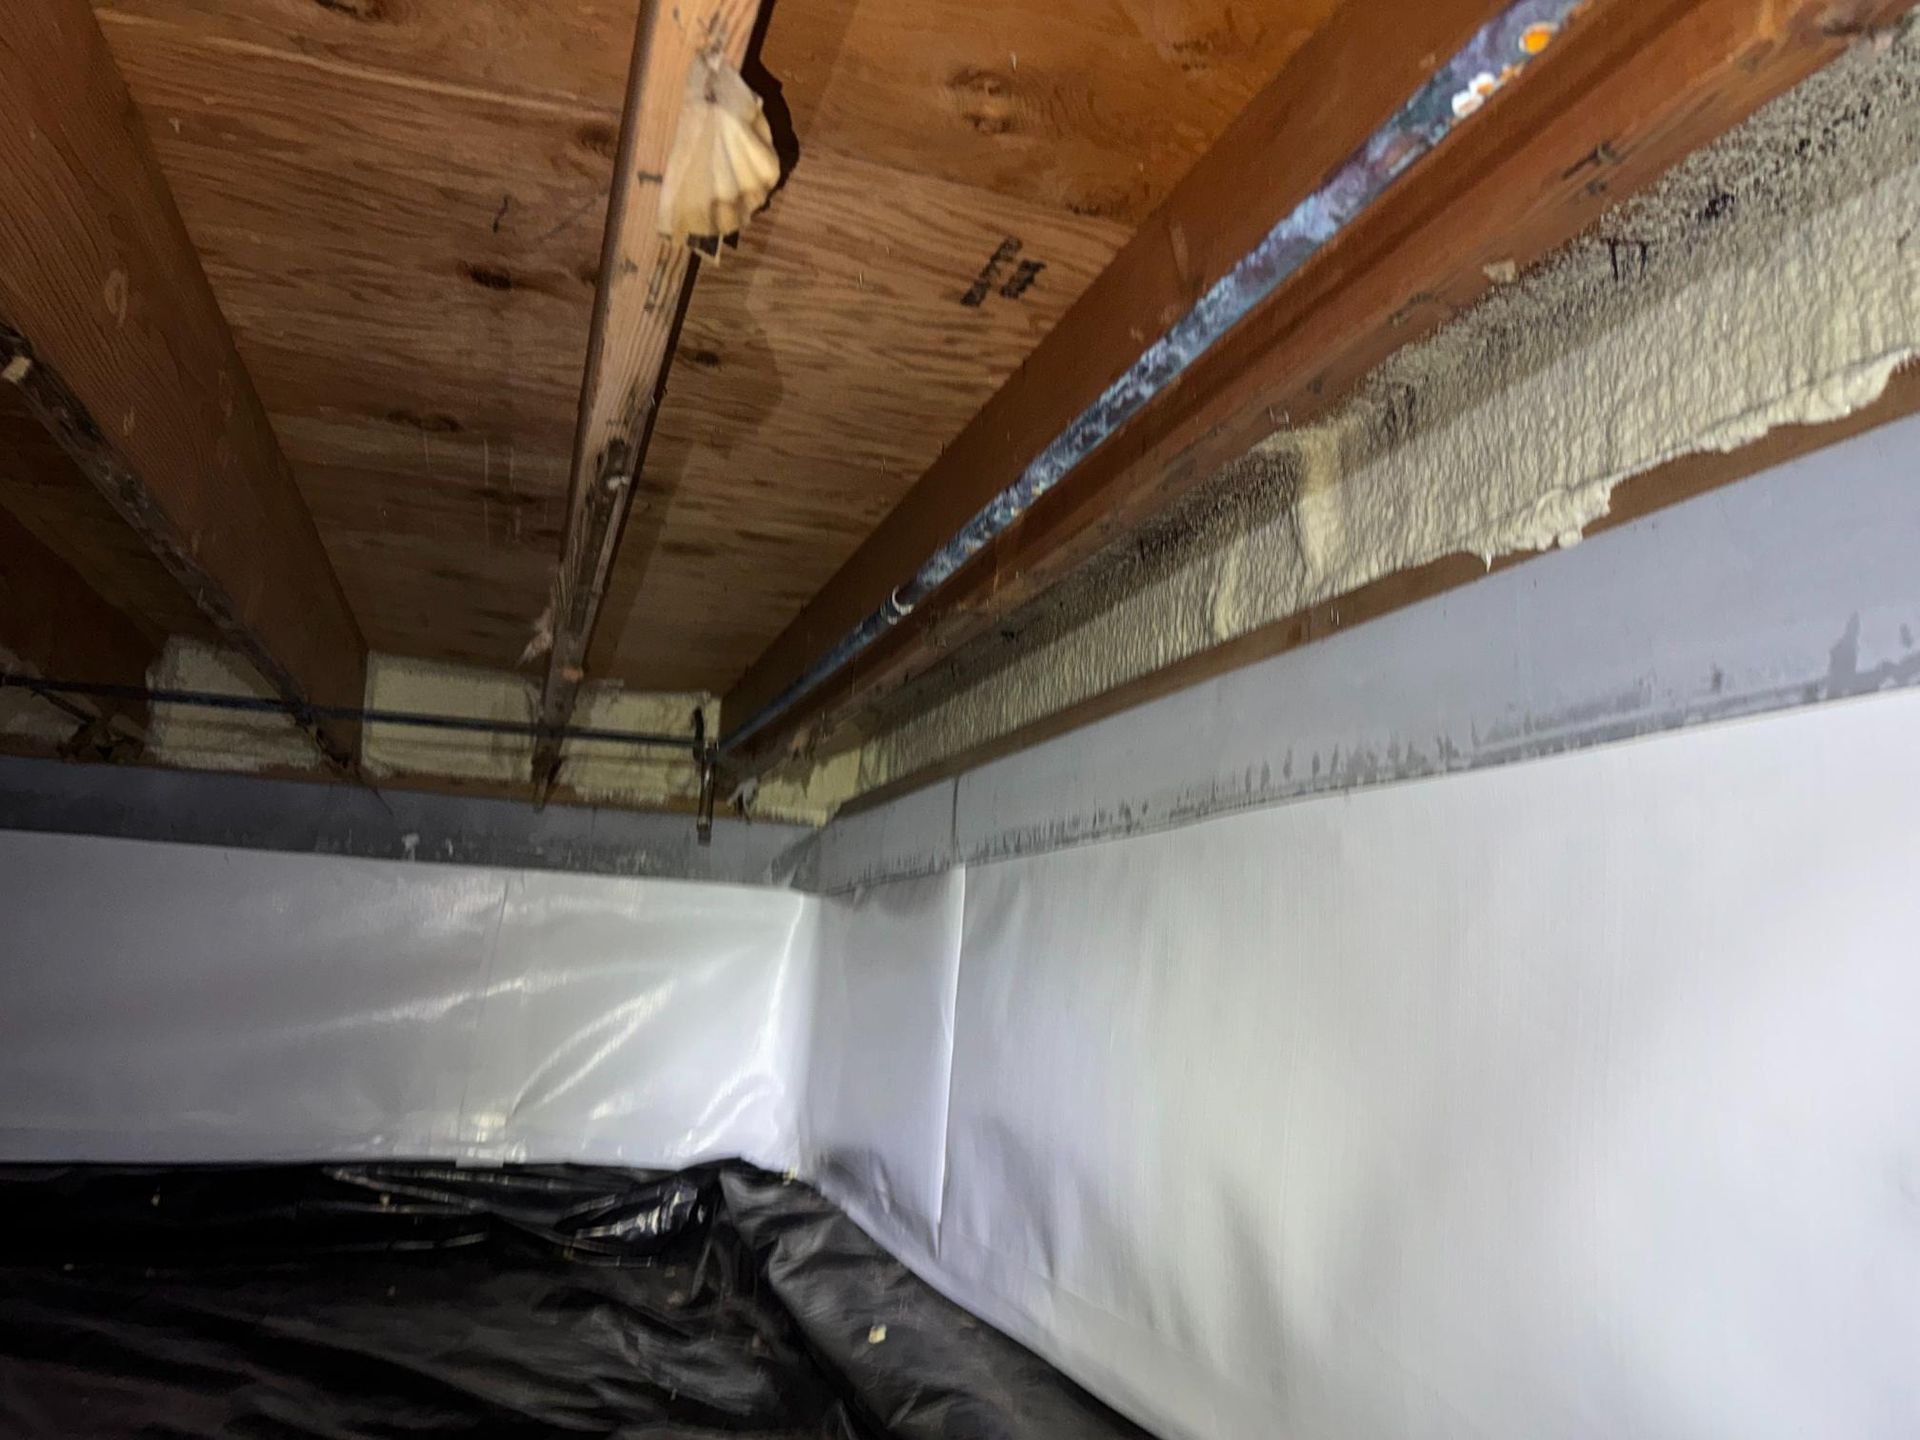
Coverage matters. The barrier needs to run up the foundation walls, not just cover the floor. Moisture comes from the walls too, not just the ground.
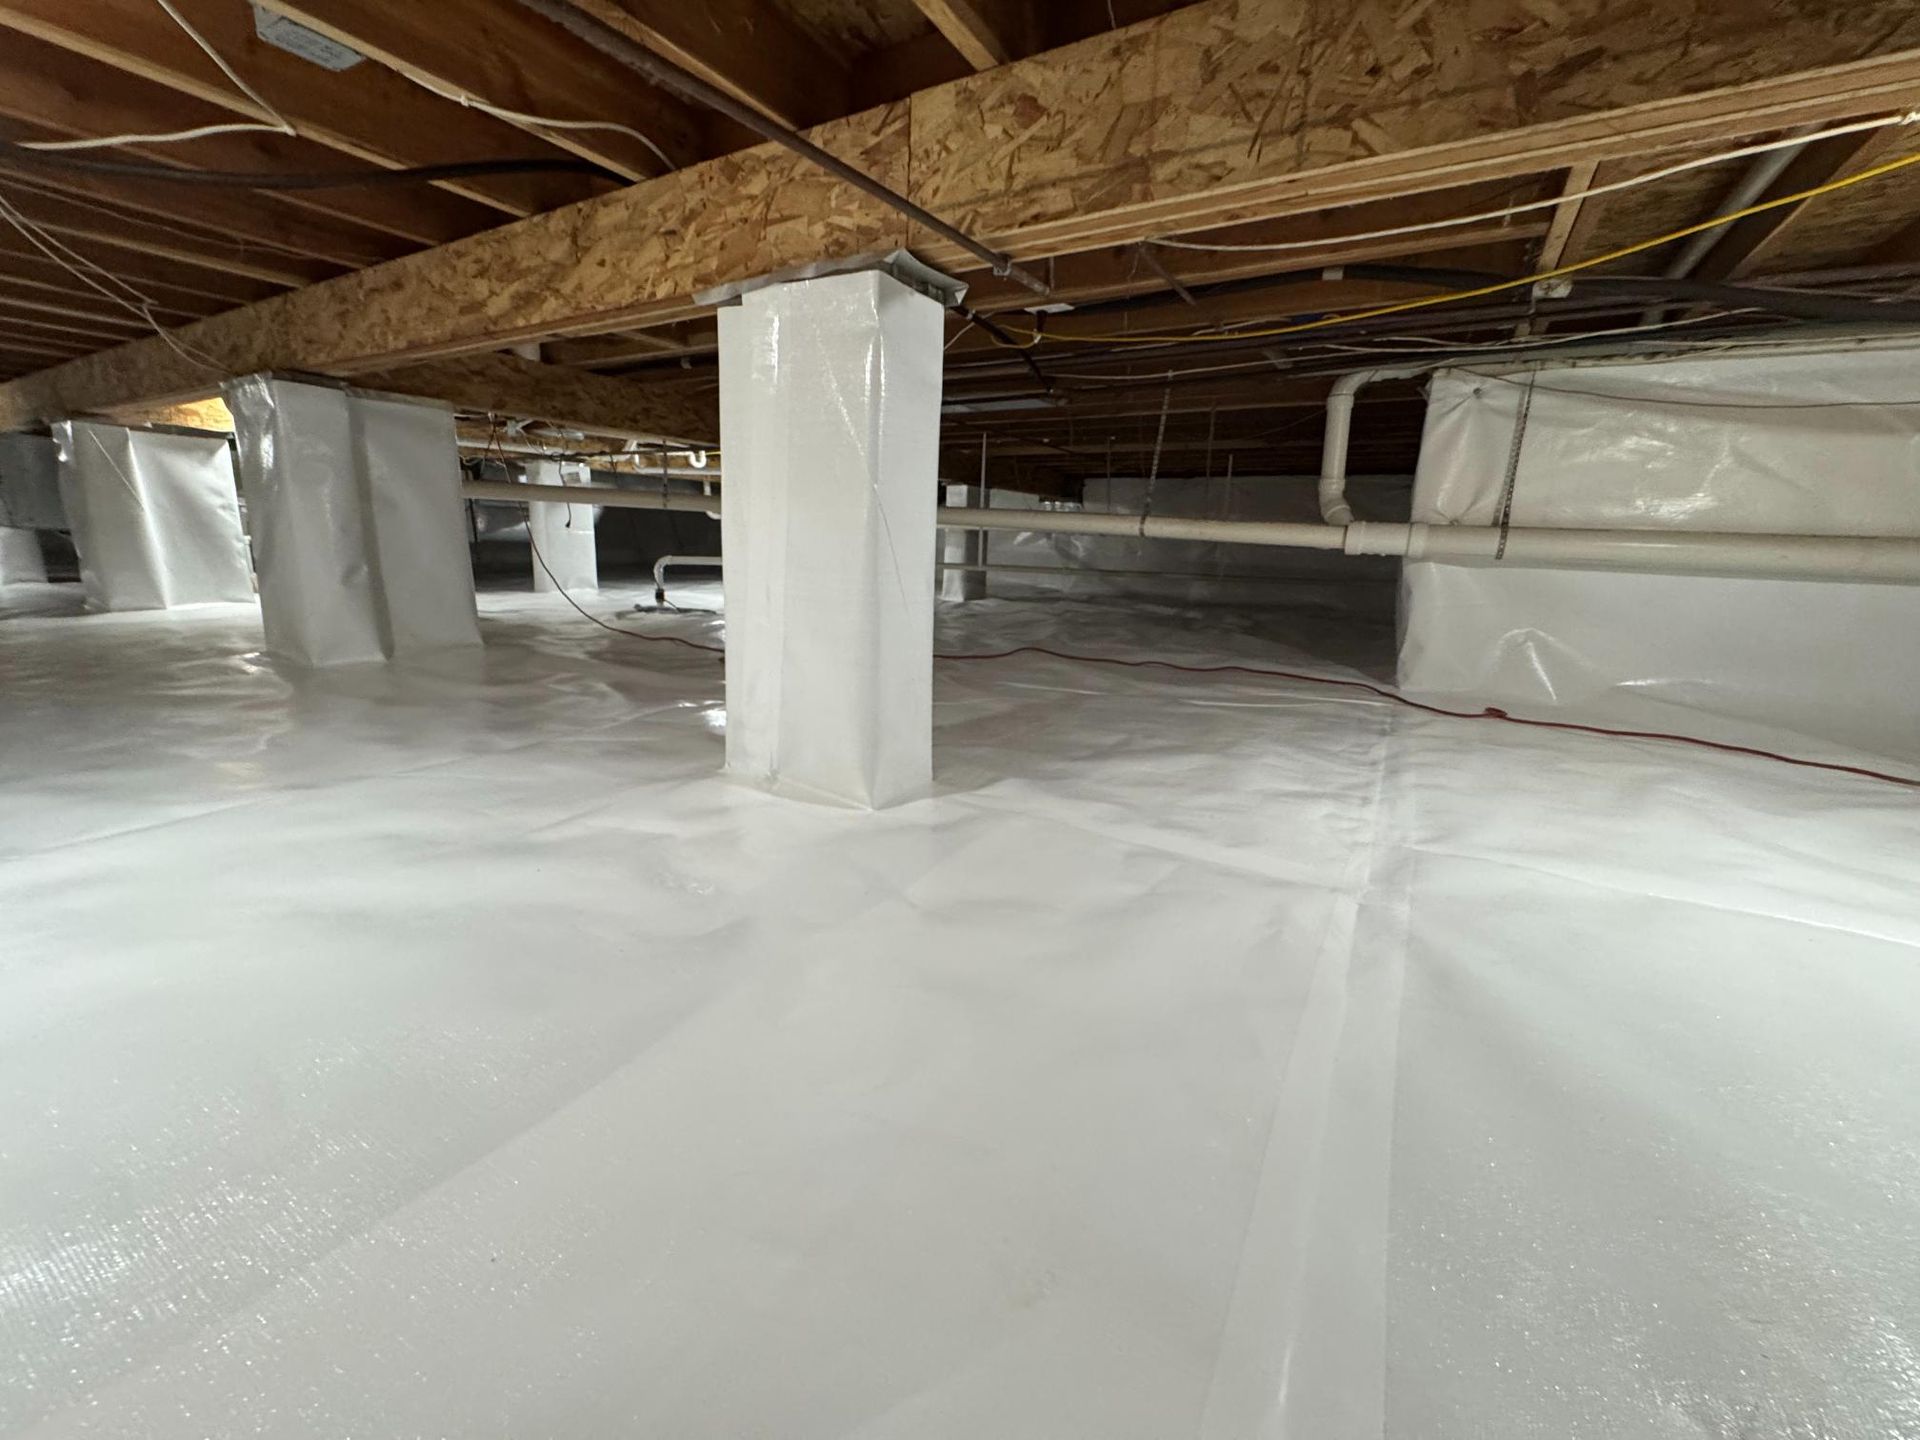
When it's done right, the poly and the dimple mat work together as one system. The dimple mat handles ground pressure from below. The poly seals everything above it. Neither layer does the full job on its own. Together they do.
What This System Actually Protects
It's easy to think of crawl space encapsulation as solving a moisture problem. And it does. But what moisture was actually doing to your home goes deeper than that.
Your floor joists sit directly above your crawl space. When humidity levels stay high down there, that wood absorbs moisture over time. It softens. It starts to sag. Floors that feel bouncy or squeaky aren't just annoying—they're telling you your floor framing system is under stress.
Then there's the air quality issue. About 50% of the air you breathe upstairs comes from your crawl space. When that space is damp, musty, and full of humidity, that's the air making its way into your living room, your kitchen, your kids' bedrooms. You can't see it, but you're breathing it.
A properly installed two layer system stops moisture at the source. Ground moisture gets redirected by the dimple mat. The vapor barrier seals off what remains. Humidity levels drop. The wood in your floor system stays dry. The air coming up into your home is cleaner.
And long term, you're protecting one of the most expensive parts of your home to repair—your floor framing system. Catching and solving moisture problems now is significantly cheaper than replacing joists and subfloor later.
Good encapsulation isn't just about comfort. It's about protecting your home for the long haul.
What to Expect From a Professional Encapsulation
Before any material goes down, the crawl space gets cleaned out completely. Old vapor barrier removed. Debris hauled out. Nothing gets covered up or left behind.
Then the dimple mat goes down across the entire floor. Not just the middle—the full coverage. Then the poly over the top, properly overlapped, sealed at the seams, and run up the foundation walls.
Lighting gets installed throughout so the space is actually usable after we're done. Not just one bulb near the access point—lights you can see by from one end to the other.
When we finish, we do a full walkthrough and document everything with photos and video so you can see exactly what was done and why.
Here are a few questions worth asking any contractor before you hire them:
Do you use dimple mat under the vapor barrier?
How thick is your poly?
Do you run the barrier up the foundation walls?
What does cleanup look like when you're done?
If they can't answer those clearly, that tells you something.
Why Central Illinois Homes Need This Done Right
Crawl space moisture isn't a universal problem. But here in Central Illinois, we've got a specific set of conditions that make it worse than a lot of other places.
The soil holds water. When we get heavy rain—and we get plenty of it—that ground moisture has to go somewhere. A lot of it pushes up through the soil directly beneath your home.
The temperature swings don't help either. Illinois winters are cold and dry. Summers are hot and humid. That back and forth puts constant stress on your crawl space environment. Wood expands and contracts. Humidity levels spike in summer. Condensation builds up in ways that most homeowners never see until there's already a problem.
We work in these conditions every day. We know what Central Illinois soil does in a wet spring. We know what a Mahomet summer does to humidity levels under a house. That regional knowledge shapes how we approach every encapsulation we do here—because a system that works in Arizona isn't necessarily the right solution for homes here.
Book A Free Inspection Now
Your crawl space problems aren't going to fix themselves. But they are fixable. Let's get it done — the right way, permanently.
Or call us directly (217) 863-9559
Ready to See What's Actually Happening Under Your Home?
If you've got moisture issues, musty smells, soft floors, or you just want to know what's going on under your house—we'd love to come take a look.
Chris or I will come out personally, do a thorough inspection, and walk you through exactly what we find. No pressure. No big sales pitch. Just honest answers about what's happening and what we'd recommend.
If you're in Mahomet or anywhere in Central Illinois, reach out anytime. We'll get back to you personally.